Shirley Hughes talks about illustrating her new picture book "The Christmas Eve Ghost."
Friday, November 12, 2010
Wednesday, November 10, 2010
Creating A Dummy Book - Part2 - Adding the Book Covers

Example of a Finished Dummy Book
By Carolyn Dee Flores
- Fold black cloth tape over the left edge of your booklet, covering the staples on both sides.

- Cut 2 Pieces of Black Foam Board For Covers.
Add ¼" to the width, and ½" to the height of your picture book format for book cover dimensions.
For example, for an 8" x 10" landscape picture book :
(2) pieces of foam board (8½" x 10¾")

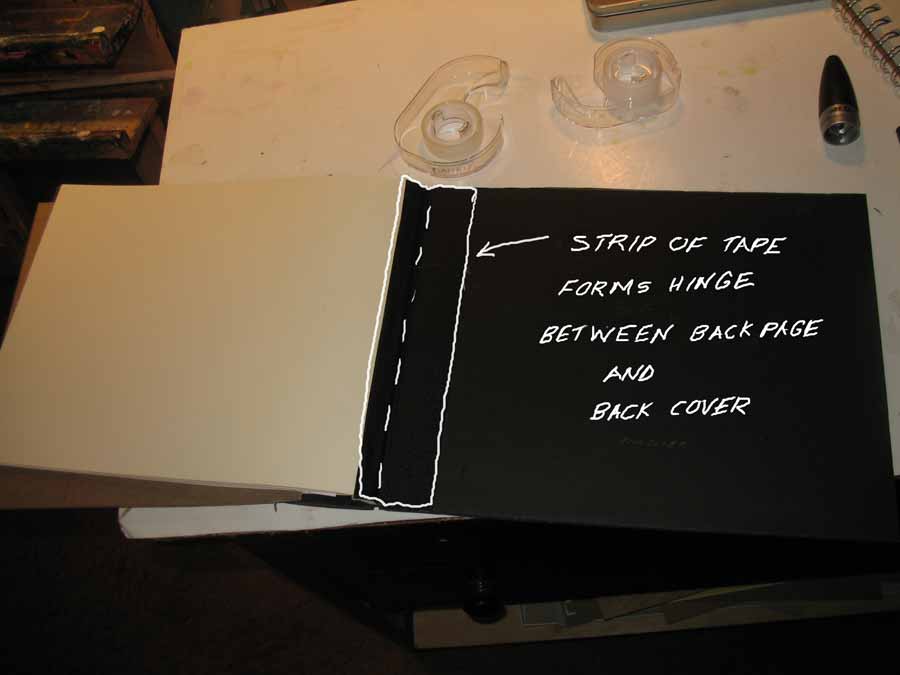
- Hinge the foam board covers to the front and back of your book with a single strip of black cloth tape, as shown here.
- Bind your book on the outside with a vertical strip of black cloth tape.
At this point, your book should be able to stand when propped open on its side, as shown here.

- Mark The Front Of Your Book.

- To create the jacket for your book, cut a piece of white brochure paper (2½ times the width of your book by the height of your cover.) Wrap the paper around your book and fold to allow for jacket flaps. Adhere with scotch tape.

- Dummy book with cover.

Next time, "Creating a Dummy Book Part3 - Content."
Carolyn Dee Flores
http://www.carolynflores.com/
Tuesday, November 9, 2010

Subscribe to:
Posts (Atom)